Wednesday, October 5, 2022

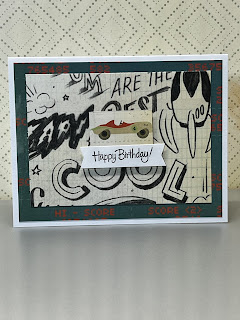
Inlay Die Cut Cars 10052022

A friend lent me this cool die cut, and I decided to pick various color papers and do a bunch of inlay die cut cards. Then I picked some stamps to add a variety of sentiments. Keeping it simple and letting the fun design of the die cut be the main point of the cards. 


And just like the last card, thanks for visiting and I hope you enjoyed. 

Tuesday, September 27, 2022

Masculine Cards 2 - 09272022

Here are some additional cards aligned on the masculine side. Not necessarily, but they will work for the males in the family. I used some cool gamer and retro paper. 


 Hope you enjoyed and got some ideas on something you can do too. 

Thursday, September 15, 2022

Masculine Cards 09152022

 I’m back to posting cards I’m making. And here are cards that are some fun cards that are more on the masculine side. This first three have a musical element.


I will be posting more soon. Stay tuned and thanks for your comments. 

Saturday, August 12, 2017

Embossed Ombre Cards 08112017

Hi! I made this cards a while back but finally got around to sharing them here. I hope you like them


I took out some of my embossing folders and some ombre cardstock and just had fun. Keeping the cards very simple and letting the embossing shine. Here are 8 easy and quick cards. Let me know what you think.


Monday, February 20, 2017

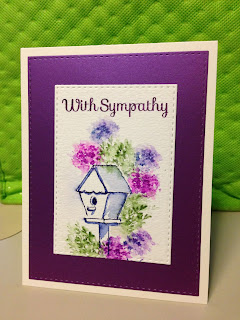
Flower Cards 022017


Hello there! I have these cards to share and to participate in SSS Wednesday Challenge: Florals and in Crafty Creations Challenge: Anything goes. I hope you like them.


 The first one to the left is an Altenew layering stamp. I also used a Wink of Stella but it's not captured on the picture. The second one on the right is a stamp from Inkadinkado, which I water colored.


 The last two are made with Art Impression's stamps. A little bit of water and some wonderful stamps and I almost feel like an artist :) 


That's all for now. Leave a comment if you like and have a blessed day!


Sunday, March 13, 2016

8 Cards with Gift Box 031616

This was a gift I made of 8 various type of cards with envelops in a box. The box was made with the We Are Memory Keepers, envelop maker and a piece of DCWV pattern paper. I hope you like this project.


I used a doily and a canvas sticker to decorate the box, and cut a slit to feed some ribbon through for the closure. At the bottom, I will leave a link to Jennifer McGuire's blog where she has a tutorial on how to make the box.


This card uses SSS light bulb stamp set and yellow washi tape on the sides.


On this card I cut an embossed cupcake panel in half and lightly inked it with a teal ink pad. I used washi tape to soften the middle and stamped a sentiment on a die cut.


This is a birthday flip-it card made with Stephanie Barnard's die cuts. Cutting some colorful striped pattern paper and I colored a stamped image with my alcohol markers.


I added a flap to have room to write a message to the recipient in the inside and used an edge punch from Stamping Up. I stamped the sentiment on the inside of the flip.


This Hello card background was made with a Faber Castell Gelatos kit. I used a wood veneer to deboss the talk bubble and impress the yellow ink. Another technic I learned from Jennifer McGuire. I then glued the little man wood veneer. 


This one I kept simple. Stamped stars on a green pattern paper piece and glued it to the card base which was inked with distress ink. I glued the sentiment on the middle of the card.


On this card I used a strip of left over embossed and inked paper and glued it to the bottom. I colored and fuzzy cut the butterfly stamp. I used my cloud corner rounders to cut the card base and stamped the sentiment on it.


This card I used star pattern paper. I then stamped the sentiment twice on white card stock and fuzzy cut one using dimentionals to give it an extra "pow!"


This last card I used a die cut to cut the patter paper. I stamped the sentiment in white card stock and did selective inking with different color inks to give it more interest. I also used my Tim Holtz's marker spritzer to get some extra color on the card base.

Here is the link to Jennifer McGuire's blog where she made the box as mentioned above.

Sunday, March 6, 2016

Pop-up Box Card 030616

This card brings such big smiles to the recipient. It can take a little more time to make, specially the first time, but it really isn't that hard to make. I watch some video tutorials in YouTube to get the measurements correct. I will link to one of them at the bottom that has the measurements to keep this a standard A2 card.


I made a few, but only took pictures of this one. I used  punched out butterfly and some sticker flowers I had in my stash. To lift the flowers I used some clear packaging and cut it into strips, although since this are flowers using some green card stock would also work. 


I used the back of the box flaps to include my "made by" stamp and the wrote my notes to the recipient on the other two sides. 

Here is the link to the tutorial video I mentioned before by Angie at My Chic 'n Scratch. You can also google box card and you will see many more, but I specially like this one because it keeps the measurements to the standard card size.